Discover the latest in tile design, installation techniques, and inspiration for your next project.
When it comes to tiling, the right adhesive is the key to a strong and lasting bond. Whether you're working on a home renovation or a large-scale construction project, choosing a high-quality tile adhesive ensures durability, water resistance, and a flawless finish. But with so many options out there, how do you find the best tile adhesive manufacturer or supplier? Don't worry! We've done the research for you. Below, we’ll introduce some of the top <strong style="color:orange" > <a href="https://www.tbond.in/" target="_blank"> tile adhesive companies </a> </strong> and suppliers that guarantee top-notch products for all your tiling needs. <br> <br> <h3 ">Why Quality Tile Adhesive Matters</h3> Using the wrong adhesive can lead to cracked tiles, weak bonds, and costly repairs. A reliable tile adhesive supplier provides products that: <ul style="list-style-type: disc; padding-left: 40px;"> <li style="line-height: 40px;">Offer excellent grip and bonding strength</li> <li style="line-height: 40px;">Are resistant to water, heat, and chemicals</li> <li style="line-height: 40px;">Work efficiently on various surfaces like ceramic, porcelain, and natural stone</li> <li style="line-height: 40px;">Ensure long-term durability and aesthetic appeal</li> </ul> By choosing a trusted tile glue supplier, you eliminate the risks associated with inferior products and enjoy peace of mind knowing your tiles will stay securely in place. <br> <br> <h3> Top Tile Adhesive Manufacturers & Suppliers </h3> Here are some of the leading tile adhesive manufacturers and suppliers you should consider: <br><br> <section style="padding-left:1.1rem;"> <h4> 1. Tbond (tbond.in) </h4> Tbond is a well-known name in the tiling industry, providing high-quality adhesives that cater to residential, commercial, and industrial projects. Their tile adhesives are known for their superior bonding strength and ease of application. </li> <br><br> <h4> 2. Home pride Tile Adhesives </h4> This tile adhesive company has built a reputation for delivering top-tier tile glues that offer excellent adhesion and water resistance. Their products are widely used in both DIY and professional tiling projects. <br><br> <h4> 3. Tile Glue Solutions </h4> One of the most trusted tile glue suppliers, Tile Glue Solutions provides premium-quality adhesives that are perfect for all kinds of tiles, ensuring long-lasting results.<br><br> <h4> 4. Construction Supplies</h4> A leading tile adhesive supplier, ROFF Construction Supplies is known for its advanced adhesive formulas that provide durability, flexibility, and moisture resistance. </ol> <br> <br> </section> <h3> How to Choose the Best Tile Adhesive </h3> When selecting a tile adhesive manufacturer, consider these factors: Tile type: Different adhesives work best for ceramic, porcelain, or stone tiles. Surface type: Adhesives vary for walls, floors, and wet areas like bathrooms. Durability: Look for adhesives with high bonding strength and resistance to water and heat. Ease of application: Choose a product that spreads easily and provides a strong grip. <br/> <br/> <h3>Conclusion </h3> A strong, long-lasting tile installation starts with choosing the right tile adhesive supplier. Whether you're a contractor, builder, or DIY enthusiast, working with a trusted tile adhesive company ensures the best results. Brands like Tbond (tbond.in) and others on our list provide high-quality solutions for all your tiling needs.
Pankaj
May 15, 2023
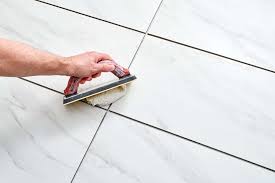
When you first install tiles, they look stunning—clean, bright, and fresh. But over time, dirt, stains, and grime settle into the gaps, making your floors look dull. The secret to restoring that brand-new look? Tile grout! In this guide, we’ll cover everything you need to know about grout, including how to clean, maintain, and choose the best grout for your tiles. </p> <h3 style="margin-top:10px" > What Is Tile Grout and Why Does It Matter? </h3> <p> Grout is the material that fills the spaces between tiles, keeping them in place and preventing moisture from seeping underneath. It also adds a finished look to your flooring, giving it a neat and polished appearance. The right grout for tiles enhances durability and makes maintenance easier. </p> <h4> Types of Grout for Tile </h4> Before you start a tiling project or refresh old tiles, you should know the different types of grout available. <ol style="list-style-type: number; padding-left:1.7rem;"> <li style="padding-block:7px;" > <b> Sanded Grout </b> : Best for wider joints, providing strong bonding and durability.</li> <li style="padding-block:7px"> <b> Unsanded Grout </b>: Ideal for narrow gaps and smooth tile surfaces.</li> <li style="padding-block:7px"> <b> Epoxy Grout </b>: Water-resistant and highly durable, perfect for moisture-prone areas like bathrooms and kitchens.</li> </ol> Choosing the right grout for tile depends on the type of surface, traffic, and exposure to water. <h3 style="margin-top:10px">How to Clean and Maintain Your Tile Grout </h3> Over time, grout can become stained, cracked, or even moldy. Here are some simple ways to keep it looking fresh: <h4>1. Regular Cleaning </h4> <ul style ="list-style-type: disc; padding-left:1.7rem;"> <p> <li>Mix equal parts of baking soda and water to create a paste. </li> </p> <p> <li> Apply it to the grout lines and scrub gently with a toothbrush.</li></p> <p> <li> Rinse with warm water and wipe dry.</li></p> </ul> <h4>2. Deep Cleaning for Stubborn Stains </h4> <ul style ="list-style-type: disc;padding-left:1.7rem;"> <p> <li> Use a mixture of vinegar and water to break down tough stains.</li> </p> <p> <li> Apply hydrogen peroxide for discolored grout.</li></p> <p> <li>Avoid using harsh chemicals that can weaken the grout over time. </li></p> </ul> <h4> 3. Sealing the Grout </h4> <ul style ="list-style-type: disc;padding-left:1.7rem;"> </p> <li> Sealing your tile grout prevents moisture absorption and staining. </li> </p> <p> <li> Choose a high-quality sealant from a trusted tile adhesive manufacturer. </li></p> <p> <li> Apply the sealant once every 6-12 months for long-lasting protection.</li></p> </ul> <h3 style="margin-top:10px"> DIY vs. Professional Grout Restoration </h3> <p> If your grout for tiles is too damaged, professional restoration might be necessary. A professional can deep clean, recolor, or even replace the grout, making your floors look as good as new. </p> <p>However, if you want a budget-friendly option, you can use grout pens to touch up discolored areas or reapply grout yourself with a grout float and high-quality adhesive from a tile adhesive manufacturer.</p> <h3 style="margin-top:10px"> Choosing the Right Tile Adhesive Manufacturer </h3> <p> A high-quality tile adhesive manufacturer offers products that ensure strong bonding and durability. Whether you're applying new tiles or regrouting old ones, using premium adhesive helps your floors stay intact for years. </p> <h4> What to Look for in a Tile Adhesive Manufacturer? </h4> <ul style ="list-style-type: disc; padding-left:1.7rem;"> <p> <li> <b> Strong adhesion </b> : Ensures tiles stay in place for a long time. </li> </p> <p> <li> <b> Water resistance </b> : Prevents mold and moisture damage. </li> </p> <p> <li> <b> Easy application</b> : Makes DIY projects smoother and more effective. </li> </p> </ul> <h3 style="margin-top:10px" > Final Thoughts: Keep Your Floors Looking Brand New!</h3> <p> With the right grout, proper cleaning techniques, and quality adhesives, you can keep your tiles shining for years. Regular maintenance and choosing the right grout for tiles will save you time, effort, and money in the long run. So, whether you’re restoring old tiles or installing new ones, take the time to choose the best products from a trusted tile adhesive manufacturer. </p> <p>Make your floors shine like new—because clean, bright tiles make a big difference in your home’s look and feel!</p> </section>
John Smith
June 2, 2023
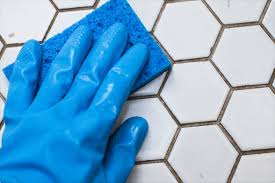
Beautiful tile surfaces can transform any space, but over time, even the most stunning tiles lose their luster. The culprit? Dirty grout lines and grimy tiles that accumulate dust, dirt, and mildew. Whether in your kitchen, bathroom, or living area, maintaining clean tile and grout is essential not just for aesthetics but also for hygiene. </p> <p> At tbond, we understand the challenges homeowners face with maintaining pristine tile surfaces. As a leading manufacturer of tile cleaning chemicals and solutions, we've helped countless customers restore their tiles to their original glory. Our specially formulated products target stubborn stains and discoloration in grout lines without damaging the tile material. </p> <p> In this comprehensive guide, we'll share ten effective methods to transform your dirty tile and grout into sparkling clean surfaces. These practical solutions range from everyday household items to professional-grade cleaners like those available at tbond. Let's dive in and discover how to bring back the shine to your tiles! </p> <h3> Understanding Tile and Grout Cleaning Challenges </h3> <p> Before we explore cleaning methods, it's important to understand why tile and grout cleaning can be challenging: </p> <ul class="unorderList" > <p> <li> Grout is porous and absorbs spills, dirt, and moisture </li> </p> <p> <li> Grout lines are slightly recessed, collecting debris and making them harder to clean </li> </p> <p> <li> Different types of tiles require different cleaning approaches </li> </p> <p> <li> Improper cleaning can damage both tile surfaces and grout </li> </p> </ul> <p> With products from tbond, these challenges become much more manageable, as our solutions are designed specifically to address the unique properties of different tile materials and grout types </p> <h3> Method 1: Steam Cleaning for Deep Tile Restoration </h3> <p>Steam cleaning is one of the most effective methods for restoring dirty tile surfaces and grout lines. The hot vapor penetrates deep into the porous grout, lifting embedded dirt without harsh chemicals. </p> <p> <b> How to do it: </b> </p> <ul class="unorderList"> <p> <li> Rent or purchase a steam cleaner suitable for tile and grout </li> </p> <p> <li> Fill the cleaner with water (and recommended cleaning solution if needed) </li> </p> <p> <li> Run the steamer slowly over tile surfaces </li> </p> <p> <li> Pay special attention to grout lines, holding the steamer nozzle directly over them </li> </p> <p> <li> Wipe away loosened dirt with a clean cloth </li> </p> </ul> <h3> Method 2: DIY Baking Soda and Vinegar Solution </h3> <p> This classic household combination works wonders on dirty grout lines and tile surfaces: </p> <p> <b> What you'll need: </b> </p> <ul class="unorderList"> <p> <li> Baking soda </li> </p> <p> <li> White vinegar</li> </p> <p> <li> Spray bottle</li> </p> <p> <li> Scrub brush or old toothbrush </li> </p> <p> <li> Clean cloth </li> </p> </ul> <p> <b> Steps:</b> </p> <ul class="orderList"> <p> <li> Make a paste with baking soda and water </li> </p> <p> <li> Apply the paste to grout lines </li> </p> <p> <li> Spray vinegar over the paste (it will bubble)</li> </p> <p> <li> Let sit for 10-15 minutes </p> <p> <li> Scrub grout with a brush </li> </p> <p> <li> Rinse with clean water and dry </li> </p> </ul> <p> While this method works for light cleaning, tbond's specialized tile grout cleaner provides more consistent results for moderate to heavy soil buildup without the strong vinegar smell. </p> <h3> Method 3: Professional-Grade Tile and Grout Cleaners </h3> <p> When DIY methods aren't enough, professional-grade cleaners like those offered by tbond deliver superior results: </p> <p> <b> Tbond </b> premium tile grout cleaner is formulated to: </p> <ul class="unorderList"> <p> <li> Penetrate deep into porous grout </li> </p> <p> <li> Break down stubborn stains without damaging surfaces </p> <p> <li> Restore original color to discolored grout lines</li> </p> <p> <li> Work effectively on various tile surfaces including ceramic, porcelain, and natural stone </li> </p> </ul> <p> <b> Application steps:</b> </p> <ul class="orderList"> <p> <li> Apply tbond's tile grout cleaner directly to grout lines</p> <p> <li> Allow it to sit for the recommended time (usually 5-10 minutes) </p> <p> <li> Rinse thoroughly with clean water</li> </p> <p> <li> Dry with a clean towel </li> </p> </ul> <p> Our customers report that tbond cleaners restore their tile surfaces to like-new condition with minimal effort compared to generic cleaners.</p> <h3> Method 4: Oxygen Bleach for Safe Whitening </h3> <p> Unlike chlorine bleach, oxygen bleach is safe for colored grout and most tile surfaces: </p> <p> <b> How to use:</b> </p> <ul class="orderList"> <p> <li> Mix oxygen bleach powder with warm water according to package directions </li> </p> <p> <li> Apply the solution to tile and grout </p> <p> <li> Let it sit for 15-30 minutes (longer for stubborn stains</li> </p> <p> <li> Scrub gently with a brush</li> </p> <p> <li> Rinse thoroughly</li> </p> </ul> <p> For enhanced results, tbond offers an oxygen-based tile grout cleaner that contains additional cleaning agents specifically formulated for tough grout stains. </p> <h3> Method 5: Hydrogen Peroxide and Baking Soda Mix </h3> <p> This powerful combination is excellent for whitening grout lines: </p> <p> <b> Recipe: </b> </p> <ul class="unorderList"> <p> <li> 1/2 cup baking soda</li> </p> <p> <li> 1/4 cup hydrogen peroxide </p> <p> <li> 1 teaspoon dish soap </li> </p> </ul> <p> <b> Application: </b> </p> <ul class="orderList"> <p> <li> Mix ingredients to form a paste</li> </p> <p> <li> Apply to grout lines using a brush</li> </p> <p> <li> Let sit for 10 minutes</li> </p> <p> <li> Scrub and rinse clean </li> </p> </ul> <p> For commercial applications or large areas, tbond's specialized cleaners offer a more efficient alternative to this homemade solution, with formulations that maintain consistency across large tile surfaces. </p> <h3>Method 6: Alkaline Cleaners for Greasy Kitchens</h3> <p>Kitchen tile surfaces often accumulate greasy residue that requires alkaline cleaners:</p> <p> <b> Process: </b> </p> <ul class="orderList"> <li><p>Choose an alkaline cleaner suitable for your tile surfaces</p></li> <li><p>Apply directly to greasy tiles and grout</p></li> <li><p>Allow to sit for the recommended time</p></li> <li><p>Scrub with a brush or cloth</p></li> <li><p>Rinse thoroughly</p></li> </ul> <h3>Method 7: Lemon Juice and Salt for Natural Cleaning</h3> <p>This natural method works well for light cleaning and disinfecting:</p> <p><b>Ingredients:</b> </p> <ul class="unorderList"> <li><p>Fresh lemon juice</p></li> <li><p>Table salt</p></li> </ul> <p> <b> Steps: </b> </p> <ul class="orderList"> <li><p>Mix lemon juice with salt to form a paste</p></li> <li><p>Apply to grout lines with a brush</p></li> <li><p>Let sit for 10-15 minutes</p></li> <li><p>Scrub and rinse</p></li> </ul> <h3>Method 8: Grout Sealing After Cleaning</h3> <p>Once you've cleaned your grout lines, sealing them prevents future staining:</p> <p> <b>Sealing process:</b> </p> <ul class="orderList"> <li><p>Ensure grout is completely clean and dry</p></li> <li><p>Apply a quality grout sealer (like those available from tbond)</p></li> <li><p>Follow package directions for application and drying time</p></li> <li><p>Wipe away excess sealer from tile surfaces</p></li> </ul> <h4>Method 9: Microfiber Mop for Regular Maintenance</h4> <p>Prevention is easier than deep cleaning. Use a microfiber mop for regular maintenance:</p> <p> <b> Maintenance routine: </b> </p> <ul class="orderList"> <li><p>Sweep or vacuum loose debris from tile surfaces</p></li> <li><p>Dampen a microfiber mop with a mild cleaning solution</p></li> <li><p>Mop tile surfaces in overlapping strokes</p></li> <li><p>Pay attention to grout lines by applying extra pressure</p></li> <li><p>Rinse and wring out the mop frequently</p></li> </ul> <h3>Method 10: Professional-Grade Steam Cleaning Equipment</h3> <p>For the most stubborn tile and grout stains or large areas, consider professional equipment:</p> <p> <b> Benefits: </b> </p> <ul class="unorderList"> <li><p>Higher temperature steam penetrates deeper into grout</p></li> <li><p>Powerful extraction removes more dirt and moisture</p></li> <li><p>Specialized attachments target grout lines effectively</p></li> <li><p>Professional results in less time</p></li> </ul> <h4>Preventing Future Tile and Grout Discoloration</h4> <ul class="orderList"> <li><p>Wipe up spills immediately before they can penetrate grout</p></li> <li><p>Use tbond's grout sealer every 1-2 years</p></li> <li><p>Implement a regular cleaning schedule</p></li> <li><p>Use doormats at entrances to reduce dirt on tile surfaces</p></li> <li><p>Avoid acidic or abrasive cleaners that can damage grout</p></li> </ul> <h3>Choosing the Right Products for Your Specific Tiles</h3> <p> <b> Ceramic and porcelain tiles: </b></p> <ul class="unorderList"> <li><p>Can handle most cleaning methods</p></li> <li><p>Benefit from tbond's all-purpose tile grout cleaner</p></li> </ul> <p> <b>Natural stone tiles (marble, granite, limestone):</b></p> <ul class="unorderList"> <li><p>Require pH-neutral cleaners</p></li> <li><p>May be damaged by acidic solutions</p></li> <li><p>Need special stone-safe formulations available from tbond</p></li> </ul> <p> <b>Glass tiles:</b></p> <ul class="unorderList"> <li><p>Require non-abrasive cleaners</p></li> <li><p>Show streaks easily</p></li> <li><p>Work well with tbond's streak-free glass tile cleaner</p></li> </ul> <h3>Conclusion: Sparkling Clean Tiles Are Within Reach</h3> <p>Maintaining beautiful tile surfaces doesn't have to be a constant struggle. With the right techniques and products, you can transform dirty tile and grout into sparkling clean surfaces that enhance your home's beauty and hygiene.</p> <p>Whether you choose DIY methods or professional-grade solutions, regular maintenance is key to keeping your tiles looking their best. Our specially formulated cleaners are designed to make the process easier and more effective, saving you time and effort while delivering superior results.</p> <p>Visit tbond today to explore our complete range of tile grout cleaner products and find the perfect solution for your specific tile cleaning challenges. With the right approach, your tile surfaces can maintain their beauty for years to come!</p> </body>
Emma Wilson
June 10, 2023
Choosing the perfect tile adhesive is as crucial as picking the tiles themselves. The right adhesive ensures your investment lasts for years, while the wrong one can lead to cracked or popped tiles. Don't leave it to chance! In this guide, we'll break down the key factors—from tile type to installation environment—so you can select the adhesive that guarantees a strong, durable, and beautiful finish for your project.</p> <p>We'll cover **cement-based adhesives** for standard jobs, **epoxy adhesives** for heavy-duty and chemical-resistant areas, and **specialty products** designed for large-format porcelain and stone. Let's make sure your tiles stick around!</p> <h3>Why Tile Adhesive Selection Matters</h3> <p>The adhesive you choose acts as the foundation for your entire tiling project. A poor-quality or mismatched adhesive can result in tiles that loosen over time, crack under pressure, or fail to adhere properly in humid environments. On the other hand, selecting the right adhesive ensures longevity, prevents costly repairs, and maintains the aesthetic appeal of your space.</p> <p>Factors like tile size, weight, substrate type, and environmental conditions all play a role in determining the best adhesive. Whether you're tiling a bathroom floor, kitchen backsplash, or outdoor patio, understanding these elements will help you make an informed decision.</p> <h3>Types of Tile Adhesives</h3> <p>There are several types of tile adhesives available, each suited for specific applications. Here's a breakdown of the most common options:</p> <h4>1. Cement-Based Adhesives (Thin-Set Mortar)</h4> <p>This is the most widely used type of tile adhesive. Made from cement, sand, and additives, it's ideal for most indoor and outdoor applications. Cement-based adhesives provide excellent bond strength and are cost-effective.</p> <ul> <li>Best for: Ceramic, porcelain, and natural stone tiles</li> <li>Advantages: Strong, durable, and versatile</li> <li>Disadvantages: Requires mixing and has a limited working time</li> </ul> <h4>2. Epoxy Adhesives</h4> <p>Epoxy adhesives are two-part systems that offer superior strength and resistance to chemicals and moisture. They're commonly used in commercial settings or areas exposed to harsh conditions.</p> <ul> <li>Best for: High-traffic areas, wet environments, and chemical exposure</li> <li>Advantages: Waterproof, stain-resistant, and extremely durable</li> <li>Disadvantages: More expensive and requires precise mixing</li> </ul> <h4>3. Acrylic Adhesives (Mastic)</h4> <p>Pre-mixed and easy to apply, acrylic adhesives are suitable for small wall tiles in dry areas. However, they're not recommended for floors or wet environments due to lower strength.</p> <ul> <li>Best for: Small wall tiles in dry, interior spaces</li> <li>Advantages: Easy application and cleanup</li> <li>Disadvantages: Limited water resistance and lower bond strength</li> </ul> <h4>4. Specialty Adhesives</h4> <p>For unique applications, specialty adhesives are available, such as those for large-format tiles, glass, or metal surfaces.</p> <ul> <li>Best for: Large tiles, glass mosaics, or non-porous surfaces</li> <li>Advantages: Tailored for specific tile types and conditions</li> <li>Disadvantages: Higher cost and limited availability</li> </ul> <h3>Factors to Consider When Choosing Tile Adhesive</h3> <p>Several factors influence the choice of adhesive:</p> <h4>Tile Type and Size</h4> <p>Different tiles require different adhesives. For example, large-format porcelain tiles need a flexible adhesive to accommodate movement, while small ceramic tiles can use standard cement-based options.</p> <h4>Substrate Surface</h4> <p>The surface you're tiling over matters. Concrete, plywood, or existing tile each require adhesives with specific properties for optimal adhesion.</p> <h4>Environmental Conditions</h4> <p>Consider moisture, temperature, and traffic. Wet areas like bathrooms need waterproof adhesives, while outdoor installations require freeze-thaw resistant options.</p> <h4>Application Method</h4> <p>Some adhesives are better for trowel application, while others work well with notched trowels or even spray application.</p> <h3>Choosing Adhesive for Different Applications</h3> <h4>Indoor Flooring</h4> <p>For standard indoor floors, a polymer-modified cement-based adhesive provides the best balance of strength and flexibility.</p> <h4>Walls and Backsplashes</h4> <p>Wall applications often use lighter adhesives that are easier to work with vertically.</p> <h4>Outdoor and Wet Areas</h4> <p>Choose waterproof, flexible adhesives that can withstand moisture and temperature fluctuations.</p> <h4>Commercial and High-Traffic Areas</h4> <p>Epoxy or high-strength cement-based adhesives are ideal for areas with heavy use.</p> <h3>Tips for Successful Tile Adhesive Application</h3> <ul> <li>Always follow the manufacturer's instructions for mixing and application.</li> <li>Prepare the surface properly by ensuring it's clean, dry, and free of contaminants.</li> <li>Use the correct trowel size for even coverage.</li> <li>Work in small sections to avoid the adhesive drying before tile placement.</li> <li>Allow proper curing time before grouting or exposing to heavy use.</li> </ul> <h3>Conclusion</h3> <p>Selecting the right tile adhesive is essential for a successful tiling project. By understanding the different types available and considering your specific needs, you can ensure a strong, long-lasting bond that will keep your tiles securely in place for years to come. Remember, when in doubt, consult with a professional or refer to manufacturer guidelines to make the best choice for your project.</p>
Lakshya
June 1, 2023
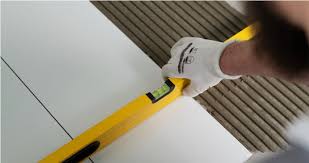
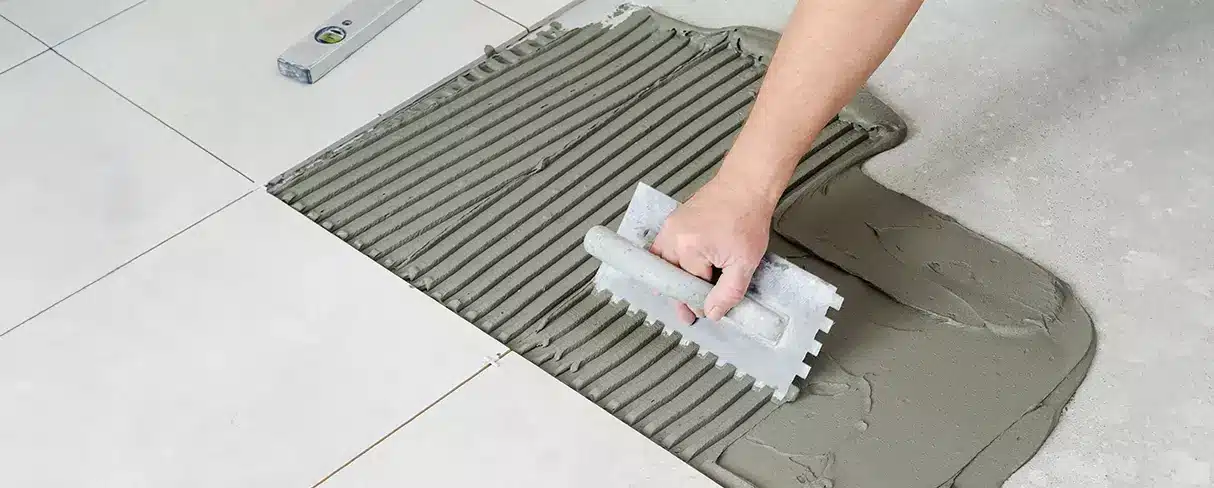
Even the best tile adhesive can fail if not applied correctly. Many DIYers and even some professionals overlook key steps that compromise the bond strength and the final appearance of the tiled surface. We want your tiling project to look flawless and last forever! Here are the five most common tile adhesive application mistakes we see and exactly how you can avoid them, guaranteeing you get a strong, professional-grade finish every single time.</p> <p>From **improper surface preparation** to **using the wrong trowel size**, these tips will save you time, money, and the frustration of loose tiles down the road. Follow these pro-level guidelines to ensure your T Bond adhesive performs exactly as intended.</p> <h3>Mistake 1: Improper Surface Preparation</h3> <p>One of the biggest mistakes is not preparing the surface adequately before applying adhesive. Dust, grease, old adhesive residue, or uneven surfaces can prevent proper bonding.</p> <p><strong>How to avoid it:</strong> Thoroughly clean the surface with a degreaser and remove any loose material. For concrete surfaces, ensure they're level and free of cracks. Use a primer if recommended by the adhesive manufacturer.</p> <h3>Mistake 2: Incorrect Adhesive Mixing</h3> <p>Mixing adhesive incorrectly can lead to poor consistency and reduced bonding strength. Adding too much water or not mixing thoroughly are common issues.</p> <p><strong>How to avoid it:</strong> Follow the manufacturer's instructions precisely. Use clean water and mix for the recommended time. Don't mix more adhesive than you can use within the working time.</p> <h3>Mistake 3: Using the Wrong Trowel Size</h3> <p>The trowel size determines how much adhesive is applied and how it's distributed. Using too small a trowel can result in insufficient coverage, while too large can create excessive buildup.</p> <p><strong>How to avoid it:</strong> Match the trowel size to your tile size. For standard tiles, a 1/4" x 1/4" square-notch trowel is common. Consult the adhesive packaging for specific recommendations.</p> <h3>Mistake 4: Applying Adhesive Incorrectly</h3> <p>Spreading adhesive in the wrong direction or not achieving proper coverage can lead to voids under the tiles, causing them to crack or pop.</p> <p><strong>How to avoid it:</strong> Apply adhesive with the flat side of the trowel first, then comb it with the notched side at a 45-degree angle to the direction you'll lay the tiles. Aim for 80-100% coverage.</p> <h3>Mistake 5: Not Allowing Proper Curing Time</h3> <p>Rushing the curing process by walking on tiles too soon or grouting prematurely can compromise the bond strength.</p> <p><strong>How to avoid it:</strong> Wait the full recommended curing time (usually 24-48 hours) before grouting or exposing to heavy use. Maintain proper temperature and humidity during curing.</p> <h3>Additional Tips for Success</h3> <ul> <li>Work in small sections to prevent the adhesive from drying before tile placement.</li> <li>Use backer board for better stability on walls.</li> <li>Test the adhesive's open time by doing a small area first.</li> <li>Keep tools clean and dispose of excess adhesive properly.</li> </ul> <h3>Common Signs of Adhesive Application Problems</h3> <p>If you notice hollow sounds when tapping tiles or see cracks appearing, it may indicate adhesive issues. Addressing these problems early can prevent more extensive damage.</p> <h3>Conclusion</h3> <p>Avoiding these common mistakes will ensure your tiling project stands the test of time. Proper adhesive application is key to a beautiful, durable finish. When in doubt, consult professionals or refer to manufacturer guidelines for best results.</p>
Lakshya
July 15, 2023
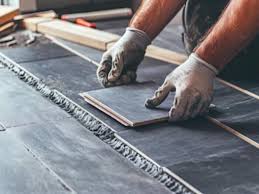
When you choose a tile adhesive, you're not just buying a bag of cement—you're investing in a complex, engineered material. High-quality adhesives, like the ones from T Bond, utilize advanced polymers and chemistry to achieve superior **bond strength** and flexibility. But what exactly makes one adhesive stronger than another?</p> <p>This article dives into the technical details: the role of **polymers** in flexibility, how **water retention** affects curing, and the importance of **shear bond strength**. Knowing the science behind the stick will help you appreciate why choosing a premium, high-polymer-modified adhesive is the key to enduring tile installations, especially in demanding environments like swimming pools or over radiant heating systems.</p> <h3>The Chemistry of Tile Adhesives</h3> <p>At its core, tile adhesive is a composite material designed to create a strong, durable bond between tile and substrate. The primary components include cement, aggregates, and various additives that enhance performance.</p> <h3>The Role of Polymers in Adhesive Strength</h3> <p>Polymers are synthetic materials added to adhesives to improve flexibility and bonding. They act as binders that increase the adhesive's ability to withstand movement and stress.</p> <ul> <li><strong>Latex Polymers:</strong> Improve water resistance and flexibility</li> <li><strong>Acrylic Polymers:</strong> Enhance adhesion to various surfaces</li> <li><strong>Epoxy Polymers:</strong> Provide exceptional chemical and moisture resistance</li> </ul> <h3>Water Retention and Curing Process</h3> <p>Water retention is crucial for proper curing. The adhesive needs sufficient moisture to allow cement hydration, the chemical reaction that creates the bond.</p> <p>During curing, water reacts with cement particles to form calcium silicate hydrate (CSH) crystals, which provide the adhesive's strength. Insufficient water can lead to weak bonds, while excess water can cause shrinkage and cracking.</p> <h3>Understanding Bond Strength</h3> <p>Bond strength is measured in several ways:</p> <ul> <li><strong>Tensile Bond Strength:</strong> Resistance to pulling forces</li> <li><strong>Shear Bond Strength:</strong> Resistance to sliding forces</li> <li><strong>Compressive Strength:</strong> Ability to withstand pressure</li> </ul> <p>High-polymer-modified adhesives typically achieve bond strengths of 200-500 psi, far superior to basic cement mixtures.</p> <h3>Flexibility and Movement Accommodation</h3> <p>Modern adhesives must accommodate building movement caused by temperature changes, humidity, or settling. Polymers provide the elasticity needed to prevent cracking.</p> <p>In heated floors or outdoor applications, flexible adhesives prevent tiles from popping up due to thermal expansion.</p> <h3>The Impact of Additives</h3> <p>Various additives enhance adhesive performance:</p> <ul> <li><strong>Retarders:</strong> Slow curing for better workability</li> <li><strong>Accelerators:</strong> Speed up curing in cold conditions</li> <li><strong>Plasticizers:</strong> Improve spreadability and reduce cracking</li> </ul> <h3>Environmental Factors Affecting Adhesive Performance</h3> <p>Temperature, humidity, and substrate porosity all influence how adhesives perform. Understanding these factors helps in selecting the right product for specific conditions.</p> <h3>Testing and Standards</h3> <p>Adhesives are tested according to international standards like ANSI A118.1, which specify minimum performance requirements for bond strength, flexibility, and durability.</p> <h3>Conclusion</h3> <p>The science behind tile adhesive strength reveals why premium products are essential for long-lasting installations. By understanding the chemistry and engineering that goes into high-quality adhesives, you can make informed choices that ensure your tiling projects stand the test of time.</p>
Lakshya
September 1, 2023